Plug your Hauppauge product into your PC or power cycle your Hauppauge product ( if this is an upgrade to an existing version of Hauppauge Capture)
Click the download button above and 'Save' Hauppauge Capture to your PC (do not select 'Run')
Once Hauppauge Capture is downloaded, run the Hauppauge Capture installation from your 'Download' folder
If you see the message "Windows Protected Your PC, Windows Smartscreen prevented an unrecognized app ...", click 'More info' and 'Run anyway'. Windows Smartscreen is a new 'feature' in Windows 10 to prevent new updates from being installed automatically.
After installation, you will be asked to reboot your PC. Please reboot.
While rebooting your PC, if you have an HD PVR 2 or HD PVR Pro 60, power cycle by removing the power plug or USB cable from the back of the device for a few seconds and then plug it back in. This resets the device.
Once your PC is rebooted, you will see the Hauppauge Capture icon on your Windows desktop. Run it.
Hauppauge Capture supports the following products:
HD PVR Pro 60
HD PVR 2 (all models)
Colossus 2 and Colossus
HD PVR Rocket
USB-Live2
StreamEez-Pro
ImpactVCB-e and ImpactVCB
HD PVR 60
HD PVR model 1212
Note: if you have the Colossus 2, HD PVR 2 model 1512 or the HD PVR 2 GE+, if you have 5.1 channel AC3 audio from HDMI or optical audio, your recordings will have 5.1 channel AC-3 audio
Personal Logo application
The HD PVR 2 and Colossus 2 Logo Inserter puts a graphic in your recordings or video streams. It does this automatically, branding your videos and streams with your logo. In the TV industry, an on-screen logo is called a 'digital onscreen graphic' or 'TV bug', and you can often see this in the lower right hand corner of news programs on TV. The Hauppauge Personal Logo application uses the Logo Inserter, and is part of the Hauppauge Capture application (it can be found in the Settings tab). There is also a standalone version which is installed with the HD PVR 2 Installation package.
The logo must be less than 1200pixels x 550pixels and be a GIF, BMP or PNG format. PNG files are recommended since they can be transparent. When creating a PNG file, create 24-bit transparent logos.
In Hauppauge Capture, click the Settings tab and then click 'Enable Personal Logo'. Then click 'Browse' and find your logo. Once you open the logo, you can position it on the screen by dragging it around with your mouse. Then click the 'Apply' button to add your logo.
If you change the record resolution, the HD PVR 2 record application will calculate where to reposition it to keep it in the same spot.
You can adjust the transparency by using the Alpha slide bar. All the way to the right makes the logo fully opaque, while moving it to the middle makes the logo semi-transparent.
The settings are "sticky". Once set, they will be applied to all future recordings (unless you re-run the Personal logo program and make changes).
HD PVR 2 and Colossus 2 Windows Drivers
To install this Windows driver update:
Click on the download link. You will be given an option to Run or Save the file. Click Save to save the file in your Download folder.
Run this file. It will install the Windows driver
When finished running the update, you will be ask to restart your PC. Restart your PC.
While the PC is restarting, power cycle your HD PVR 2 to load the new firmware. To power cycle the HD PVR 2, remove power from the unit for a few seconds and then plug it back in.
When your PC has rebooted, you should see the Hauppauge Capture icon on your Windows desktop. Double click on the Hauppauge Capture icon.
Note: You will not see video on your TV set until you run Hauppauge Capture once.
If your cables are connected, you should now be able to see your game console on your TV set and record and stream your gameplay.
This version has a fix for an Error code 52 found with some versions of Windows.
To install the driver updates:
Download this file.
Click the file to install.
When the Windows driver has been installed, you will see a message Drivers installation status: Success
When finished running the update, you will be ask to restart your PC. Restart your PC
While the PC is restarting, power cycle your HD PVR 2 to load the new firmware. To power cycle the HD PVR 2, remove power from the unit for a few seconds and then plug it back in.
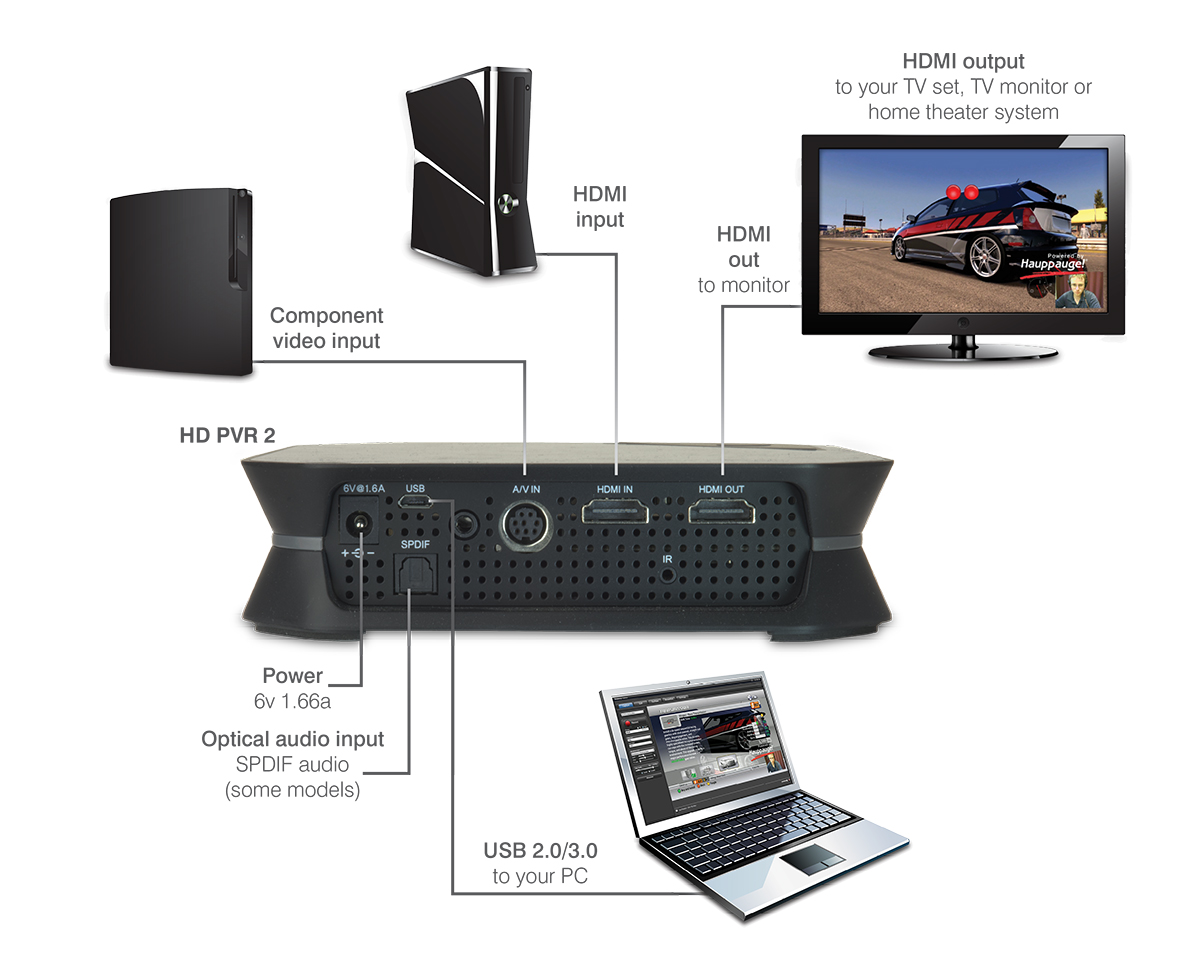
HD PVR 2 Connection Diagrams
HD PVR 2 has “no delay passthrough” so you can play your video game while recording. To use the no delay pass through, simply connect HD PVR 2 between your game console and your HD TV set. HDMI output is provided to make it easy to connect to your TV monitor.
For recording HD TV programs from a cable or satellite TV box, connect either Component video from your cable or satellite box to the AV Input on the back of the HD PVR 2. On some TV channels, you can also record from the HDMI connector on your set top box (not all channels can be recorded using HDMI, but Component video works with all TV channels). Use the included WinTV application to schedule recordings of your TV programs.
StreamEez: live stream your game play, with hardware acceleration
StreamEez: stream your videos with Facebook Live and YouTube
Note: there are two versions of StreamEez. One is part of Hauppauge Capture and can be found in the StreamEez tab in Hauppauge Capture. There is also a stand alone version of StreamEez which is described below.
Quick start to Twitch streaming with Hauppauge Capture's StreamEez
In the StreamEez tab of Hauppauge Capture, click Start Device
In Channel select Login and enter your user name and password
You will be brought to the Twitch login service. Click Authorize
In Location, you can select the nearest Twitch ingest point to where you are located
When you are ready, you can click Start Streaming to go online with your video stream
The standalone StreamEez application Stream your live videos to Wowza, YouTube, Facebook Live and other RTMP/RTSP streaming services
click to enlarge
New features in this version
Adds support to use a username and password in 'Generic RTMP/RTMPS' streaming
Changes default port of RTMP/RTMPS on StreamEEz Pro to Port 0 so Facebook URL's will just work out of the box or any URL's which include the port number in the URL (which most do now)
Removes UStream and Twitch from list of target servers (Twitch can be streamed in Hauppauge Capture with any product)
Default service now RTMP/RTMPS for StreamEEz Pro and YouTube for other products
HDMI Input is now default input
For Twitch users: add your channel name and pause for a commercial break
For YouTube users: fixes problems with YouTube recording of video streams
Adds an automatic re-connect mode, to re-establish streaming when your Internet connection is momentarily lost
Adds streaming support for the HD PVR Rocket
Bug fixes for Wowza and RTMP streaming with no port specified
To install this version of StreamEez:
Click on the download link. You will be given an option to Run or Save the file. Click Save to save the file in your Download folder.
Run this file. It will install the StreamEez-Pro application plus the Windows driver.
When finished running the update, you will be ask to restart your PC. Restart your PC
While the PC is restarting, power cycle your StreamEez device to load the new firmware (remove power from the unit for a few seconds and then plug it back in).
When your PC has rebooted, double click on the StreamEez-Pro icon.
Under Source (upper left hand corner), make sure it is set to your Hauppauge device.
If your cables are connected, you should now be able to stream with Twitch or YouTube.
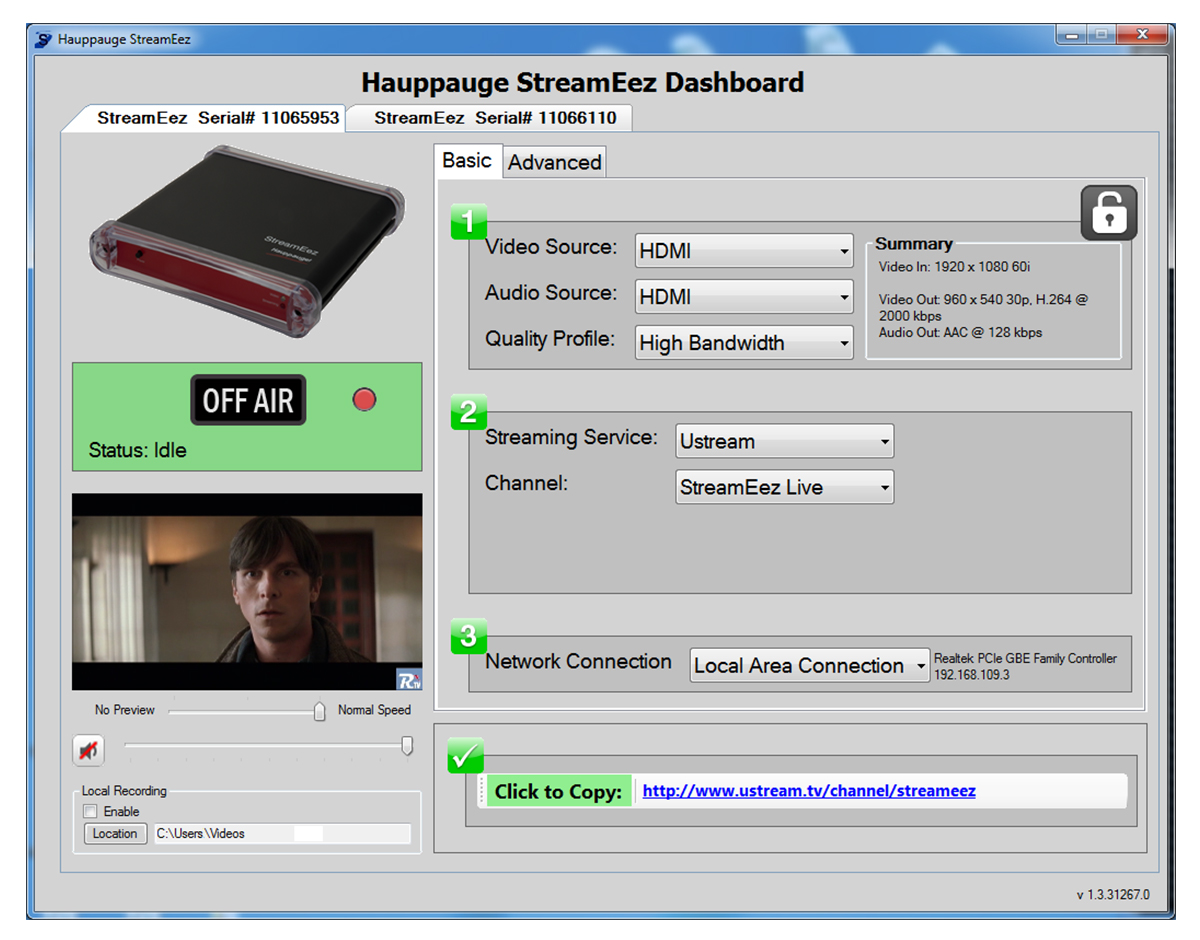
Some tips on using StreamEez (standalone)
Step 1
Before you change any settings, make sure you are Off Air and the Lock button is unlocked (just click on the button to unlock).
Choose your Video Source. Xbox 360 normally uses HDMI while PS3 normally uses Component.
Choose your Audio Source. Xbox 360 normally uses HDMI while PS3 normally uses Line.
In Quality Profile, the default is High Bandwidth. Depending upon the uplink speed of your Internet service, you may need to change to Medium or Low bandwidth. A laggy or jerky stream means your uplink speed is too low and you need to choose a different Quality Profile.
If you would like to preview your video in StreamEez, make sure the slider under the preview window is set to 'Normal speed'. You should now see your video in the preview window.
StreamEez Software Setup (standalone)
Step 2
Then choose your Stream Service, either Twitch or YouTube. ( You must have an account setup with the stream service you wish to use)
In Channel, select Login. Enter your Login and Password. You will see a message "Gathering credentials" as we check your user name and password.
Once your user name and password are confirmed, you will see the URL of your stream in the box "Copy stream link". If you click on the words "Copy stream link", the URL will be copied to the clip board.
Step 3
Leave the Network Connection as the default
To start streaming
To start streaming, click the red dot next to "Off Air." The indicator should be changed to "On Air" and you will now be streaming live over the Internet!
Once you are On Air, you cannot change any settings. You need to stop streaming by clicking the green dot next to On Air to stop the stream.
WinTV for the HD PVR 2 and Colossus 2
Note: WinTV is a TV watching, pausing and recording application. It is provided with the HD PVR 2 models 1512 and 1507 only. All other versions of HD PVR 2 can be used with WinTV but require the purchase of an Activation code.
Use HD PVR 2 with a Mac. Free activation when you purchase the HD PVR 2 Gaming Edition Plus. For more details, please contact: techsupport@hauppauge.com
Capture4ME is compatible with HD PVR 2. It is an easy-to-use application that focuses on the core goal of capturing video. The Capture4ME app has the ability to trim the beginning or end of a recording, and also an 'Upload to YouTube' function for those that want to share their videos online.
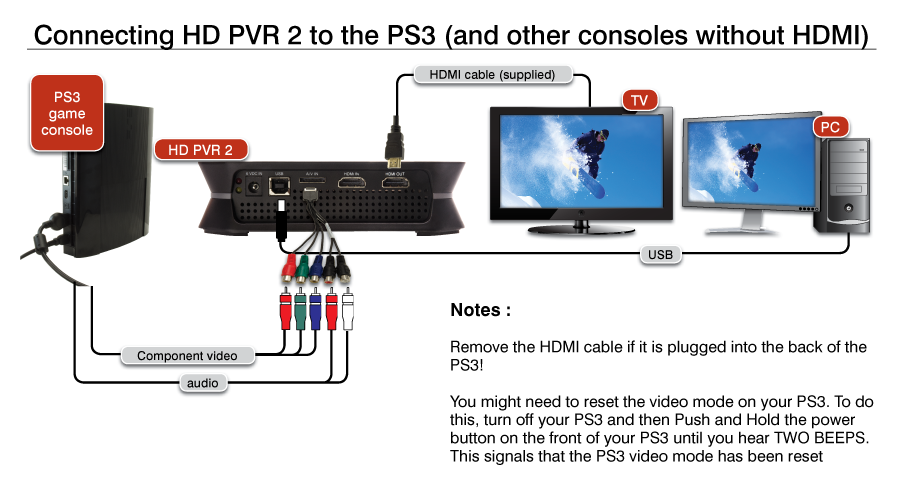
PS3 setup
PS3 to HD PVR 2 Connection Diagram
How to turn off HDCP on your PS4
Are you unable to record video, getting no video (but you might get choppy audio) in your recordings or a black screen in Hauppauge Capture?
Does the Input resolution indicator in Hauppauge Capture switch between '1920x1080p 60fps' and 'Waiting for HDMI video signal'?
If so, you should turn off HDCP copy protection on your PS4
Hauppauge game recorders cannot record HDMI video which has HDCP copy protection. Video with HDCP copy protection can come from an Xbox One or a PS4, or a cable TV or satellite box. Note: if you have a cable TV or satellite box, you should use Component video and not HDMI. HDMI out on cable/sat boxes often has HDCP copy protection.
If you have a PS4, you need to disable HDCP. Here is how to do this:
First, connect your PS4 directly to your gaming monitor (since you will not be able to see the PS4 on your computer screen if there is HDCP copy protection on the PS4)
Next, go to Settings: from the main user interface, push up on the DualShock 4 to reach the top-level of the system’s menu, and select the toolbox labelled ‘Settings’.
Enter the System submenu: When the long list of options appears, scroll down to the icon named ‘System’ and select it.
Turn off HDCP encryption: You’ll find another long list in Settings. Scroll down to ‘Enable HDCP’ and ensure that the box to the right of the label is not checked. It will be enabled by default, so simply click on it to disable the HDCP copy protection.
If you have any applications open, the system will ask you to close them, so make sure that you’ve saved your game before completing this last step.
Now you can reconnect your PS4 back to the Hauppauge game recorder, and the HDMI out of the Hauppauge game recorder to your TV monitor. You should be able to see your game on your computer screen and TV monitor.
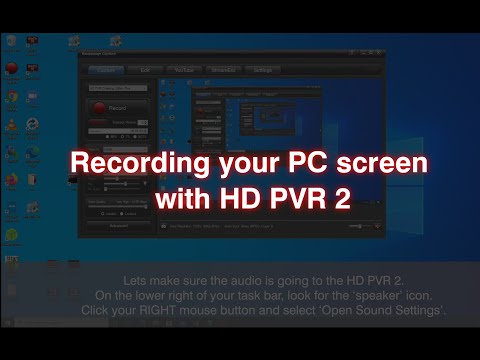
Using HD PVR 2 to record PC game play or your PC screen using HDMI
Note: HD PVR 2 can accept video from a PC in the following formats ONLY: 1920 x 1080 at 60Hz max, 1280 x 720 at 60 Hz max and 720 x 480 at 60 Hz max. If you are running in any other video mode, you will see either a black screen or distorted video. Check your video mode!
Note: if you do not have audio in your recordings, please refer to Steps 4 and 4a. When using HDMI Output on a PC, audio can go to either the HDMI connector or the Speaker output. If you do not have audio in your recordings, then audio is going from the wrong place on your PC.
Step 1 - Install the HD PVR 2 on your PC
Connect the HD PVR 2 to your PC (the PC where you will be recording) using the supplied USB cable. Connect the power to the HD PVR 2.
Install Hauppauge Capture from this Support page in the Capture tab.
When you are finished with the installation, you will need to reboot your PC. While your PC is rebooting, power cycle the HD PVR 2 by removing the power connector for a few seconds.
After you reboot, run Hauppauge Capture by double clicking on the icon on your Windows desktop.
At this point you might not see video in the Capture preview window. This is normal.
Step 2 - Configure your Gaming PC's video mode
Note: HD PVR's can accept video from a PC in the following formats ONLY:
1920 x 1080 at 60Hz max (1080p60)
1280 x 720 at 60 Hz max (720p)
720 x 480 at 60 Hz max (480p)
If you are running in any other video mode, you will see either a black screen or distorted video. Check your video mode!
On the computer where you will be playing your video games (we'll call this the Gaming PC), connect an HDMI cable from your graphics card HDMI port to the HDMI in on the HD PVR.
Note: your Gaming PC screen may go black for several seconds and then you will be back at the Windows desktop.
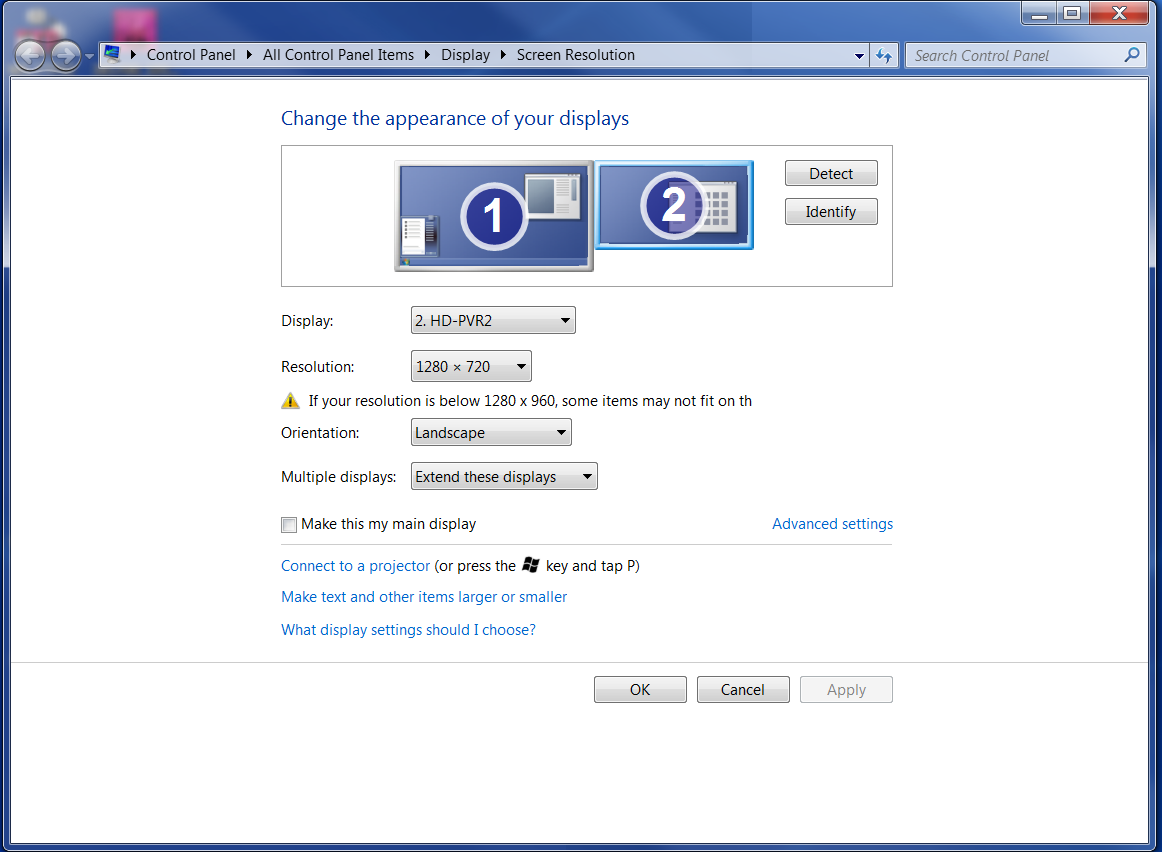
Under Display you should see your HD PVR model in the drop down menu. Example: HD PVR 2.
Select your HD PVR recorder (click for screen shot).
Under Resolution, set to either 1920X1080 or 1280X720.
Under Multiple displays, set to Duplicate these displays.
Step 3 - Connect the HDMI cable from your Gaming PC to the HD PVR's HDMI In connector
If you have a gaming laptop, simply plug an HDMI cable from your laptops' HDMI out port into the HDMI In on the HD PVR. You should see your PC screen on the video monitor.
If you do not, click the Windows button on your keyboard and at the same time the P key. Then select Duplicate. If you have set your PC's video mode correctly (step 2 above), you should see your PC screen on the video monitor.
If you have a desktop PC, then remove the HDMI cable which is plugged into the monitor and plug it into the HDMI In port on the HD PVR. Then take an HDMI cable and plug one end into the HDMI Out port on the HD PVR and the other end into an HDMI port on your monitor. If you have set your PC's video mode correctly (step 2 above), and you have selected the correct HDMI source on your TV set, you should see your PC screen on the video monitor.
Step 4 - Configure the audio on your Gaming PC if sound comes through your HDMI cable
Recording from a PC? Here's how to set the audio.
Playback sound
If you are using the HDMI pass through on the HD PVR (if you are not using HDMI pass-through skip to step 4a), on your Gaming PC right click on the Speaker icon on the taskbar and select Playback device.
In Playback devices find your HDMI connection to the HD PVR (it should say HD-PVR2, HD PVR Rocket or sometimes Digital audio (HDMI)). Right click and select Set as default device.
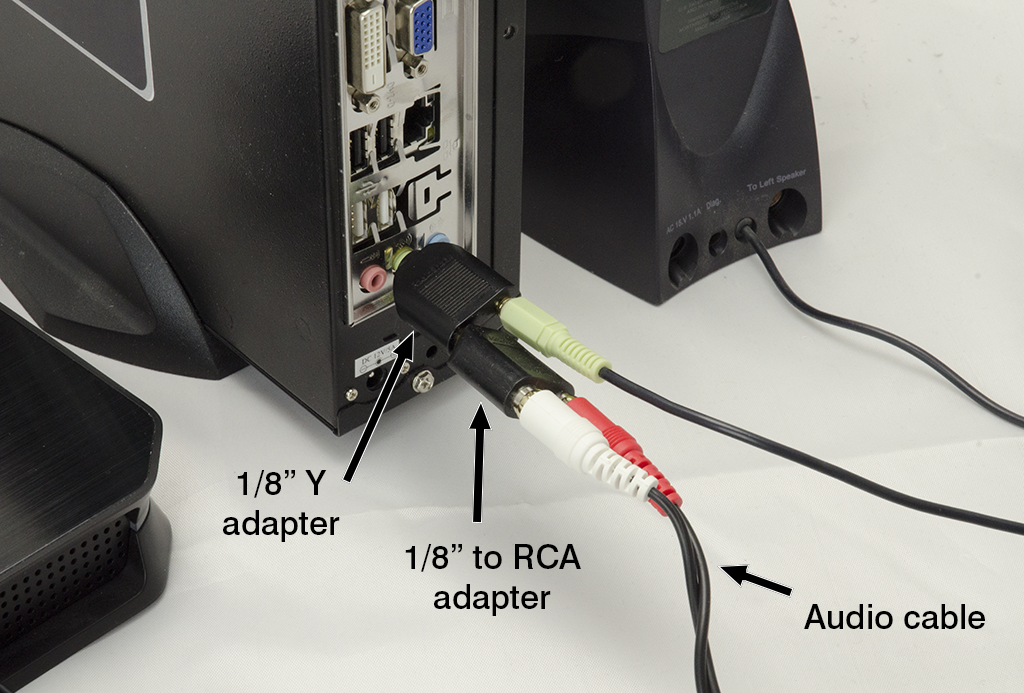
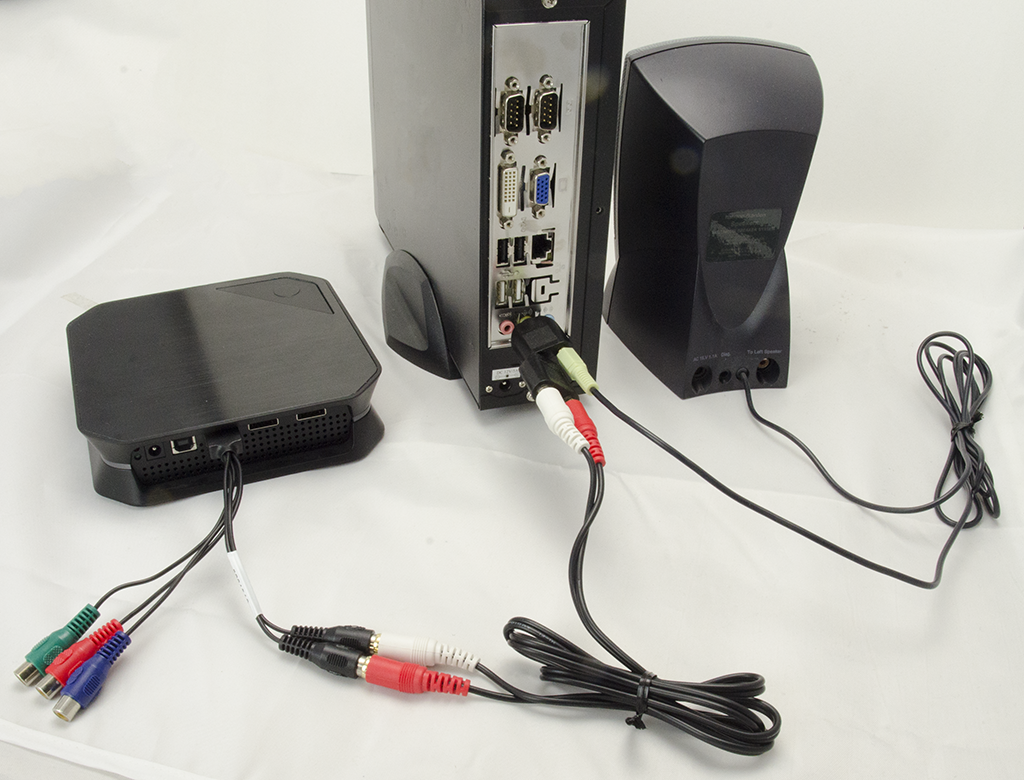
Step 4a - Configuring audio if you are using speakers connected directly to your Gaming PC
If you are listening to sound from your Gaming PC through speakers and not on your video monitor, to hear audio without any audio delay you will need to split the audio coming from your Gaming PC. To do this, you will need two adapters: an 1/8th inch stereo Y adapter, a 1/8th inch stereo to RCA male adapter.and an Audio cable set. These adapters are common and can be purchased from Radio Shack or online.
Connect the 1/8" stereo 'Y' adapter to the green audio port (the audio out port) on your Gaming PC.
Plug your speaker cable into one end of the 1/8" stereo 'Y' adapter.
On the other end of the 1/8" stereo 'Y' adapter connect the 1/8th inch stereo to RCA male adapter
In Hauppauge Capture, in the Capture or StreamEez tab, set Audio in to Line in and mute the audio (so you will not hear an audio echo).
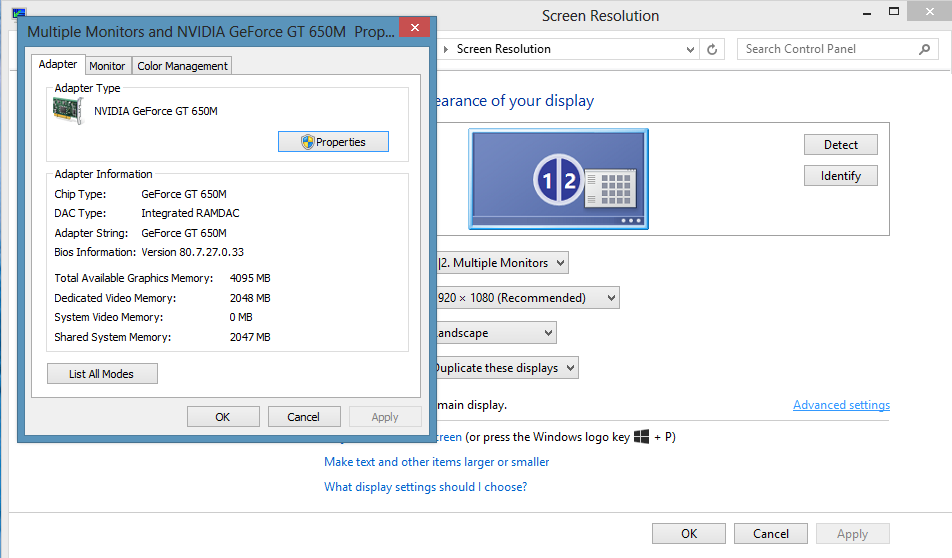
Here are some screen shots if you have an nVidea 650M graphics adapter in your gaming PC
Screen resolution menu
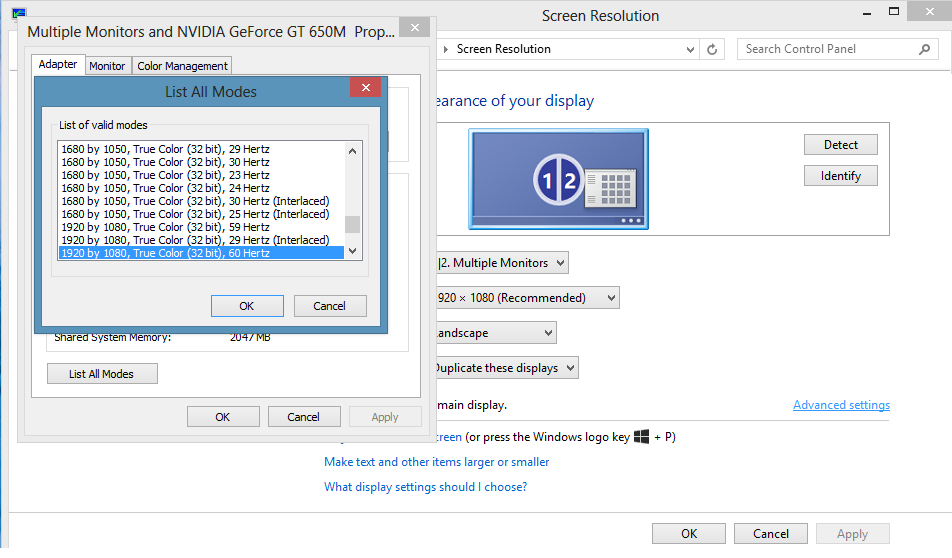
Advanced Settings menu. Then click List All Modes
List All Modes menu. Set the screen resolution to 1920 by 1080, True Color (32-bit), 60Hz. Then click OK / OK and Apply.
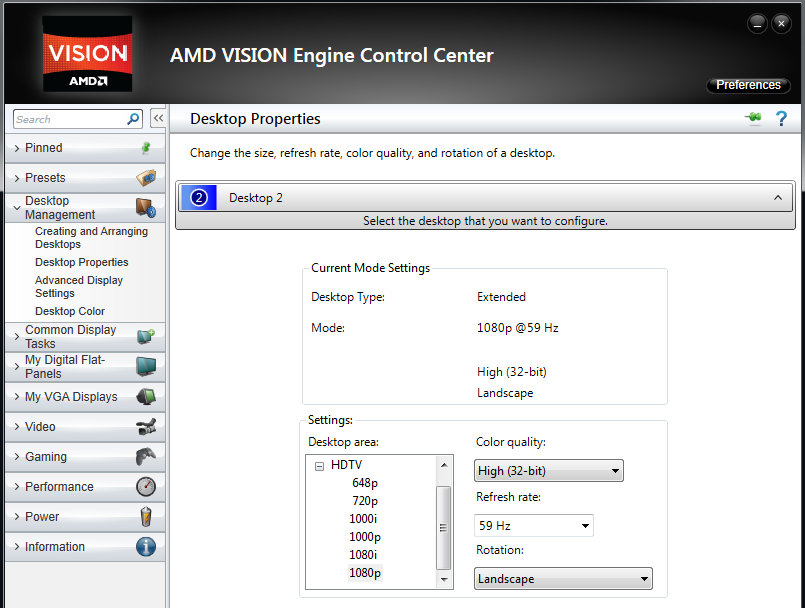
Here are some screen shots if you have an ATI graphics adapter in your gaming PC
In the AMD Vision Control Center, under Desktop Management/Desktop Properties, set the Desktop area to 1080p or 720p and the Refesh rate to 60Hz, 59Hz or 50Hz
Tutorial on editing HD PVR 2 recordings with Sony Vegas
Click here to see a tutorial on editing HD PVR recordings with the Sony Vegas Editor
HD PVR 2 connection diagrams
HD PVR 2 Gaming Edition has video pass through for no delay recordings. Simply connect HD PVR 2 between your game console and your HD TV set.
HD PVR 2 and Colossus 2 Frequently Asked Questions
What Operating Systems are supported by the HD PVR 2 and Colossus 2?
Microsoft Windows 10, 8, 8.1, Windows 7 or Vista (32 or 64-bit), or Windows XP with Service Pack 2 or later.
There is also new Linux support for the HD PVR 2 and Colossus 2.
Do I need a PC to use HD PVR 2?
Yes, a PC or laptop is required to use HD PVR 2. The PC is used to both run the HD PVR 2 application plus is the place where HD PVR 2 recordings are stored. HD PVR 2 does not have any internal disk storage. HD PVR 2 connects to a PC or laptop computer through a USB 2.0 port. The HD PVR 2 recordings are stored on the PC's disk drive.
If you want to record your HD videos without a PC, you should use the HD PVR Rocket.
If you have a Mac, there is an application from HDPVRCapture which can be used. Go to http://www.hdpvrcapture.com for more information.
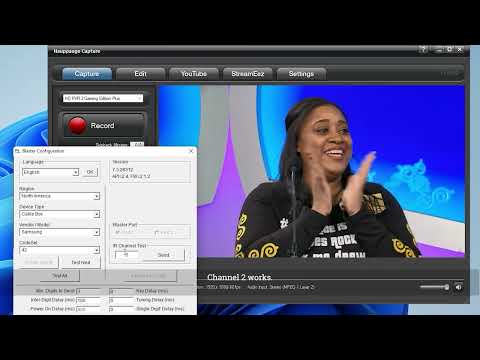
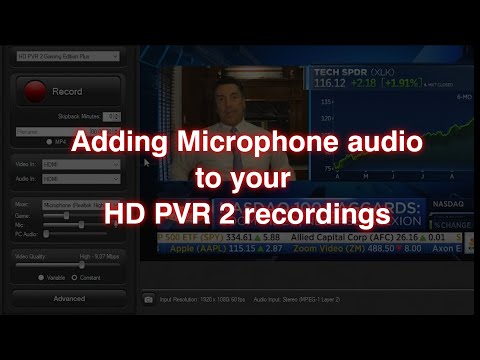
I use the HD PVR 2 Gaming Edition. I was wondering how I can record my commentary with game audio?
With the Hauppauge Capture application, you can plug your microphone into the 'mic input' on your PC. Hauppauge Capture will mix your game play audio with microphone audio. With Hauppauge Capture, there are seperate volume adjustments for game play and microphone audio. You can also add PC sound (music or Skype audio) to mix together PC audio with game audio and your game commentary.
In some cases, in order to have third party chat in your recordings and streams, you might need the Hauppauge Chat cable.
What types of video sources can I record?
The HD PVR 2 can record from HDMI (without HDCP), Component video and composite video. Video input resolutions can range from standard definition 720x480 up to 1080p60. Common examples are:
video cameras with HDMI out
game consoles such as the Xbox One, PS4, PS3, Xbox 360
PC Graphics cards (from the HDMI port on the graphics card) so you can record your PC screen
cable or satellite set top box can be recorded from Component video and composite video. HDMI is often blocked with HDCP copy protection on cable and satellite boxes, so you should use Component (red/green/blue connectors on the back of your cable/satellite box) or composite video (the yellow connector on the back of your cable/satellite box) for best results. Some people have reported they can record HDMI from a cable/satellite box, but many boxes block the HDMI port with HDCP copy protection.
I want to use my HD PVR 2 with OBS to stream retro game play. How do I setup OBS?
First, we assume that your retro gameplay is coming in from composite video (the yellow cable) and left/right stereo audio.
OBS by default uses HDMI audio/video, so you need to change the source in OBS to composite video and left/right stereo audio. If you have the Hauppauge Component AV Cable (Part number 6021333), connect the yellow jack from your video source to the Blue RCA jack on the Hauppauge AV cable.
Here are the steps to setup OBS:
First, open Hauppauge Capture. In Hauppauge Capture under Video In, select Composite and under Audio In select AV In. Make sure you can see your retro game video in the Hauppauge Capture preview window. If not, check your cables. You must see video in Hauppauge Capture before you can move onto OBS
Once you can see your video in the preview window, close Hauppauge Capture and open OBS
The first thing to do in OBS is add a new Video Capture Device. In Sources, click the + and select Video Capture Device
Select Hauppauge Sienna Video Capture and click OK
Next, click Configure Crossbar. A few seconds later you should see the video source setup for the HD PVR 2. Choose the source you are connected to, such as Composite In. You will have five choices: 0 Video Parallel Digital In which is HDMI, 1 Video YRYBY In which is Component video, 2 Video SVideo In which is S-Video, 3 Video Composite In for composite video and 4 Video RGB In
Then finish the setup: click Apply, OK and then Deactivate, Reactivate and then OK
In about 15 seconds you should now see your composite video source in the OBS Preview window.
How to turn off HDCP on a PS4
On the PS4, go to Settings: from the main user interface, push up on the DualShock 4 to reach the top-level of the system’s menu, and select the toolbox labelled ‘Settings’
Enter the System submenu: When the long list of options appears, scroll down to the icon named ‘System’ and select it
Turn off HDCP encryption: You’ll find another long list in Settings. Scroll down to ‘Enable HDCP’ and ensure that the box to the right of the label is not ticked. It will be enabled by default, so simply click on it to disable the irritating feature. If you have any applications open, the system will ask you to close them, so make sure that you’ve saved your game before completing this last step.
How to turn off HDCP on an Xbox One
The following is from the Xbox support site
Problem: Playing premium content on your console establishes an HDCP connection with your television. Some unintended video and sound behavior may occur if you plug in a DVR or home entertainment system while the console is turned on.
To resolve this problem, try the following solutions:
Restart your Xbox One console:
Press the Xbox button on the console for ten seconds until the console turns off.
Touch the Xbox button on the console again to turn it on.
Try to play the content again.
If your Xbox One console is in instant-on power mode:
Go to the Home screen.
Press the Menu button on your controller and select Settings.
Go to Power & startup, then Power options.
Select Power mode and then select Save Energy.
Turn off the console by holding the Xbox button.
Turn on the console by pressing the Xbox button, and then try to play the content again.
I am getting an echo when I record with my microphone. How can I fix this?
Windows has a setting which allows the microphone to be played back through the PC system, which will cause an echo. To fix this in Windows:
Right click the speaker icon in the device tray and select Open Sound settings. Then go to Sound => Input => Device Properties => Additional device properties. Click on the Listen tab and uncheck Listen to this device.
I am getting squeaky audio when I record game commentary with my microphone. How can I fix this?
Sometimes the audio sampling rate of the microphone is not matched to the audio recording from the HD PVR 2. In order to match them up, set the sampling rate of the microphone to 48Khz. Here's how to do this:
On your PC, go to the speaker icon on the right side of your desktop's toolbar, right-click the speaker icon and select "Recording devices".
Then in the new window that opens, locate your microphone and the right-click it in the list and select the option "Properties". A new window called "Microphone Properties" will open.
Go to the "Advanced" tab. There you'll see a section named "Default Format", click the drop down menu and select this from the list: 2 channel, 16 bit, 48000 Hz (DVD Quality). Then click apply, restart your PC and give the recording another try.
Can I record composite video or S-Video?
Yes. To record composite video with the HD PVR 2 or Colossus 2, simply connect the yellow connector from your video source to the blue connector on the Hauppauge AV cable. Then, in Hauppauge Capture, set the Video Source to Composite.
For S-Video, you will need to use the optional Hauppauge AV cable model 6021252 which you get purchase on the Hauppauge Webstore. Hauppauge Capture has a setting for S-Video.
Recordings from composite or S-Video are still made in the H.264 format.
I'm trying to record from a Nintendo Switch, but I'm getting a 'No HDMI signal detected' message. How can I fix this?
The basic problem is that the Switches HDMI resolution is not what the HD PVR 2 needs to sync up.
Do this:
In the Switch settings System settings > TV output > TV resolution, change from 'Automatic' to either 720p or 1080p
you must connect the power to the docking station before connecting the HDMI lead to the HD PVR 2
I'm not getting audio on my TV monitor, but I have audio in my recordings. How can I fix this?
Some users have reported that they get audio in their HD PVR 2 recordings, but do not hear audio on their monitor. We find that this is caused by the Hauppauge HD PVR 2 being able to accept AC-3 audio but the monitor is only two channel audio.
In Hauppauge Capture, go to the Advanced Settings -> Audio Encode and click the button which says 'Disable HDMI AC3 support'. This forces your video source to output 2 channel audio which should work with your monitor. Then power cycle all your devices: your game console or video source, your monitor and the HD PVR 2. When you power everything up again, the HD PVR 2 will report that it can only do 2 channel audio and you should now have audio from your monitor.
Can I connect the HD PVR 2 passthrough cable to a standard TV which does not have HDMI?
No. The HDMI output of the HD PVR 2 can only be used on an TV set with HDMI connectors. HDMI TV sets normally display 720p or 1080p video.
Can I use HD PVR 2 with a Mac?
If you buy the HD PVR 2 Gaming Edition Plus, it comes with a free copy of HDPVRCapture for the Mac.
If you have an HD PVR 2 or an HD PVR 2 Gaming Edition, you can buy HDPVRCapture separately. For more information, please go to: www.hdpvrcapture.com.
What kind of webcam can I use to make Facecam videos?
Hauppauge Capture uses any webcam, either HD or standard definition, as long as it has a 'raw' YUV or YUY2 mode. MJPEG and other compressed formats are not used. Your webcam can be 4:3 or 16:9. Popular webcams include the Microsoft Lifecam HD-3000 plus, if you have a laptop, the built-in webcam.
Hauppauge Capture chooses the most suitable video mode supported by your webcam. You can set the size of the video, and the format (4:3 or 16:9) in the Settings menu of Hauppauge Capture.
System Requirements
Windows 10, 8, 7, Vista and Windows XP with service pack 3. Mac support from HDPVRCapture.com
You can record HD PVR 2 video on pretty much any PC. Older, slow, laptop or desktop PCs can be used to record HD PVR 2 video. Preview video on older PCs and laptops might be jerky and laggy but your recordings will be fine.
But when you playback an HD PVR 2 recording on your PC screen, you need a fast CPU and at least 256MB of graphics memory. Here is what we recommend for video playback (minimum):
Dual core CPU 2.0Ghz or faster
Graphics with 256MB memory (or greater)
Sound card
USB 2.0 Port
Can I record video from my old Nintendo, PS2 or Wii?
Yes. Connect the yellow cable from your console (Nintendo, PS2, Wii or any other game console which has a yellow composite video connector) to the Blue connector on the Hauppauge AV cable. Then connect the red and white audio cables from your Wii to the red and white connectors on the Hauppauge AV cable. Then, in Hauppauge Capture or Hauppauge Capture, select Composite under Video input and Line In under Audio input.
Would you like to support the HD PVR 2 in your own Windows application?
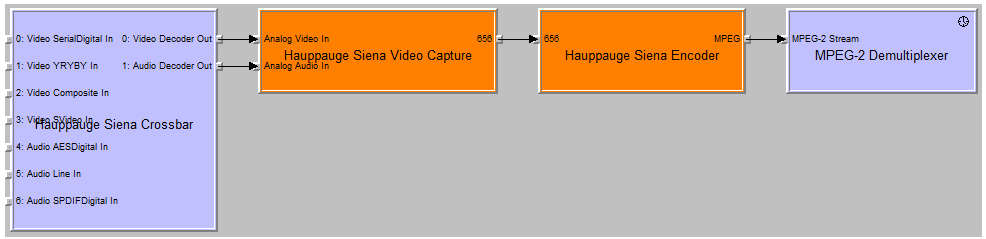
You can access the HD PVR 2 in your DirectShow application. Simply build a Directshow graph and add the crossbar, capture and encoder filters. Then connect them all up, and it'll output a transport stream containing H.264.
You can then demultiplex it or do whatever you want to it. And you can use standard Microsoft API like IVideoEncoder to control the bitrate. Here is a link to the Graphedit graph.
Can I use the HD PVR 2 with Linux?
We are starting to test our Linux support for the HD PVR 2. You can get information on the Linux support for HD PVR 2 here: https://www.hauppauge.com/linux
Can I use HD PVR 2 with the Hauppauge WinTV v8 or WinTV v7 application?
Yes. WinTV v8.5, WinTV V8, WinTV v7 and WinTV v 7.2 are compatible with all models of the HD PVR 2.
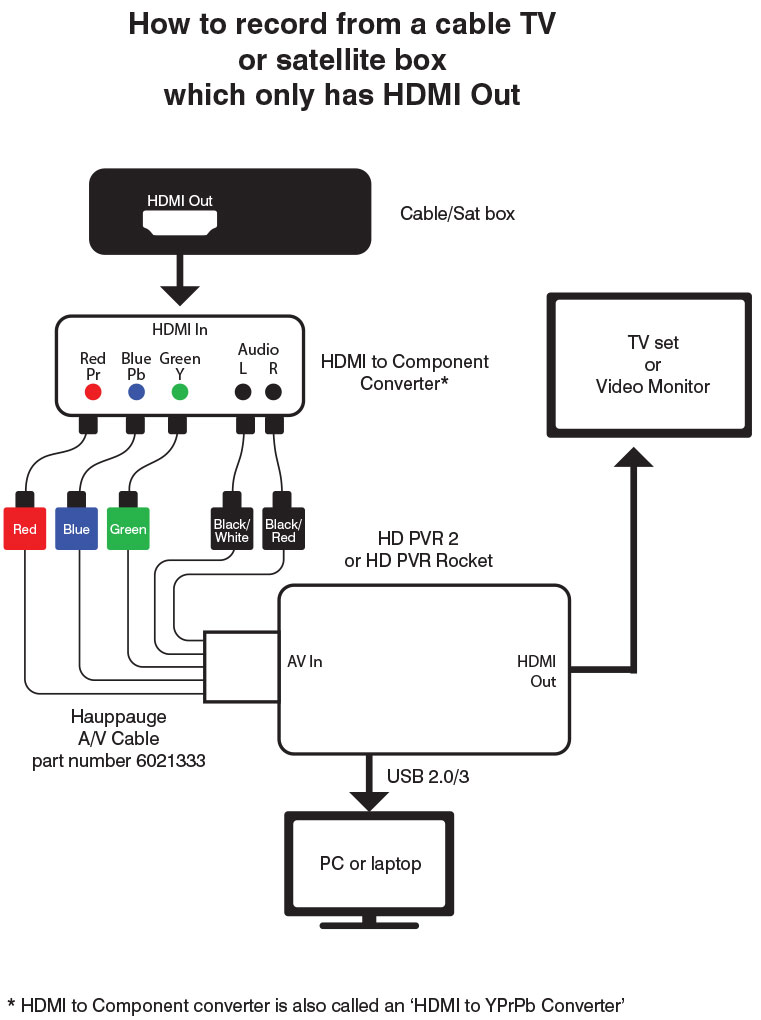
Can I record high definition TV from a Cable TV or Satellite box or DVR?
If your satellite or cable box or DVR has Component Video connections on the back of the receiver (normally Red/Green/Blue or marked YPrPb), then the answer is "yes".
By connecting the Component video output from your high definition cable TV or satellite TV set top box to the Component video inputs of the HD PVR 2, you will be able to record the TV programs coming from your set top box to the hard disk. Component video connections are normally the Red/Green/Blue connectors on the back of a set top box. Sometimes they are also called YPrPb or YCrCb connectors.
The HD PVR 2 goes between the cable or satellite box and the TV set. HD PVR 2 has component video in and HDMI out, so the connection to your cable or satellite box can be Component video, and the connection to your TV set is HDMI.
Note: the HD PVR 2 also has HDMI in, but from experience we find many cable and satellite boxes put HDCP copy protection on HDMI.
What type of recordings can I make with the HD PVR 2?
HD PVR 2 encodes in an H.264 format. It records in TS or M2TS file formats, which is a basic H.264 'transport stream'. Many people would like to know if the quality of a TS or M2TS recording is as good as an MP4 recording. The video quality of MP4 and TS files are the same. The primary difference between TS and MP4 files is that TS files are flat while MP4 files have an index at the beginning of the MP4 file. Otherwise, the video bits inside the files are the same and therefore the video quality of TS, M2TS and MP4 files are the same.
All record file types can be used to burn AVCHD Blu-ray compatible discs but you will need to supply your own disc burning application.
What type of audio encoding is made with the HD PVR 2?
There are two ways of bringing audio into HD PVR 2: through the Line In (RCA) stereo audio jacks on the A/V connector or through the HDMI connector. When bringing audio in through the stereo jacks, audio is recorded as MPEG 1 layer 2 audio. When bringing audio in through the HDMI connector, the audio is also recorded in the MPEG 1 layer 2 format.
DTS audio is currently not supported.
If you have the HD PVR 2 model 1512 or the HD PVR 2 Gaming Edition Plus and are bringing in 5.1 channel audio from either HDMI or optical audio, your recordings will be made with 5.1 channel AC-3 audio.
Can I output files I've recorded with my HD PVR 2 or other content from my PC back to an external TV monitor through the HDMI outputs on the HD PVR 2?
No, the HD PVR 2 itself does not have the ability to play back recorded videos to an external monitor. To playback recorded videos, you will need to connect your laptop or PC to your TV set.
The HDMI video output on HD PVR 2 acts as a pass through for live video streaming from your video source through the HD PVR 2 back to your TV monitor. The power of the HD PVR must remain in the on position in order to pass the video through to the external TV.
If I record my game play, can I uploaded it to YouTube?
Yes. Recordings made with HD PVR 2 are either in TS, M2TS or MP4 formats, which can be immediately uploaded to YouTube without conversion. Hauppauge Capture records from HD PVR 2 in an H.264 form which is used by YouTube. And the Hauppauge Capture Edit tab allows you to trim your videos very quickly without the need to re-encode.
I'm streaming my gameplay with YouTube, but I cannot get YouTube to record the videos. What am I doing wrong?
YouTube will not record your video streams unless you set a start time and an end time in your streams. If you simply start and stop a YouTube stream, YouTube will not record it.
Can my PC go into hibernate or sleep mode when using HD PVR 2?
The current Windows driver for HD PVR 2 does not allow your PC to go into Hibernate or Standby mode when it is either recording or previewing video.
Can I record my webcam while recording and streaming with the HD PVR 2?
Yes for recording, no for streaming. With the latest version of Hauppauge Capture, you can record your videos with a webcam in your recordings. This is called the 'Facecam' feature in Hauppauge Capture. Facecam allows you to specify the location and size of video from your webcam in your recordings.
I'm using a PS3 and I see a black preview screen in Hauppauge Capture. How can I fix this?
This happens if you connected your PS3 using HDMI and now want to use Component video so you can record with HD PVR 2.
To fix, you need to reset the video settings on your PS3. To do this:
- Make sure you have the HDMI cable disconnected on your PS3
- Then push the PS3 power button on the front of the PS3. You should see the light go Red. This means your PS3 is turned off.
- Then hold down the PS3's power button until you hear two beeps (one beep, then about 5 seconds and a second beep).
Your PS3 should now be set to Component video out and you should see video in the preview window in Hauppauge Capture.
How To Record Xbox 360 Game & Party Chat
1. Go to the Xbox Guide Menu
2. Go along to settings.
3. Select Voice.
4. Go down to voice output and select 'Play though both'. This will make the audio play out your TV and through your mic at the same time.
Depending on what game you are on, I highly recommend you turn down game volume as well as sometimes voice chat can't be heard because the game volume is too loud. However I guarantee that there will be a way to turn down your audio setting on whatever game you are on. Make sure you make it loud enough to hear, but quiet enough to make the voice chat clear and easy to hear.
I'm using a PS3, and the video in the Hauppauge Capture preview window has incorrect colors?
Most of the time this is caused by either one of the Component video connectors is not connected. For example, if the Red connector is not connected correctly, your video picture will look green.
Also try updating to the latest drivers supplied by your graphics card manufacturer.
I see a change in brightness every few seconds in Hauppauge Capture and Hauppauge Capture while recording, streaming or playing back my video recordings. But my recordings are fine. What is going on?
If you are running an AMD graphics card in the PC which the HD PVR 2 is connected to, you may experience a slight change in brightness every few seconds while in the preview or edit screens. This is due to an issue with hardware acceleration that we have seen in some AMD drivers. This shift does not affect recordings and typically can be eliminated by either changing drivers for the graphics card or by disabling Hardware acceleration.
Video is jerky or broken up while capturing, yet my recordings are perfect. Why?
This is caused by either a slow processor in your laptop or desktop PC, or the display adapter is having a problem. Make sure your video card meets the minimum requirements. Also try updating to the latest drivers supplied by the manufacturer.
In September 2012, there was a problem with the ATI graphics driver which would cause jerky video or freezing of the video screen. This should be fixed with an update from ATI on their graphics drivers.
I get a black screen in the preview window when using Component video from a cable TV set top box.
Some set top boxes will disable or turn off the component output if the HDMI or DVI output is being used. Check to see how you have your Television connected to your set top box. You might need to disconnect the HDMI connector on your set top box when you want to record TV programs.
Audio pass through does not work
In order for the audio pass through to operate, you need to configure the Audio settings in the Hauppauge Capture application. Click on the Capture tab. In the Audio input section, choose your audio source from the drop down menu ( RCA, HDMI ). Once configured, the HD PVR 2 will retain these settings. Note: the HD PVR 2 must be powered on for the pass through to operate.
My video recordings look pixelated with fast motion. What can I do?
Increasing the recording bitrate will eliminate motion artifacts in your recordings. In Haupauge Capture, in the Capture tab make sure Variable is selected. Than start with Quality set to 11 Mbits/sec. This should give you very good quality. You can continue to increase the Quality up to a maximum of 14 Mbists/sec.
You can experiment with other settings, but in our experience, these are good for uploading to YouTube.
What resolutions and bit rates are supported using the HD PVR 2?
Video record resolutions are 1080p30, 720p60, 540p60, 480p60 and a number of downscale variants of these formats.
You can record at datarates from 1Mbs to 13.5Mbs. If you choose Variable, the maximum recording datarate is about 1.5 times the selected rate. As an example, if you have Variable selected and set the Quality to 14Mbits/sec, the maximum rate will be about 21 Mbits/sec.
What file formats are created by recording with the HD PVR 2?
Hauppauge Capture records in a TS file or M2TS file directly. TS is also called 'AVCHD' and is the native format for Blu-ray DVD discs. Also, Hauppauge Capture has an Export to MP4 function, which adds an index to the beginning of a TS recording and creates an MP4 file. This usually takes just a few seconds and does not change the video quality of your recording.
How much disk space will it take up when recording?
Approximately 2 GB per hour at 5Mb/s setting.
Approximately 4 GB per hour at 9Mb/s setting.
Approximately 6 GB per hour at 13.5 Mb/s setting.
Can I use HD PVR 2 independently from a PC?
No, the HD PVR 2 requires a PC to operate. If you want to record without a PC, you should use the HD PVR Rocket.
If you are using the HD PVR 2, once you have connected your PC to HD PVR 2 and run Hauppauge Capture, you can disconnect the USB cable to your PC and the passthrough will continue to run as long as HD PVR 2 still has power.
Can I use a longer USB cable with my HD PVR 2?
It is not recommended to use a longer USB cable other than the 2 meter USB cable provided with the device.
Can I burn a Blu-ray disc with my HD PVR 2?
You can burn Blu-ray compatible discs, but a disc burner is not supplied with HD PVR 2.
What are the specifications for the power adapter that is included with the HD PVR 2?
The power adapter is 6V 1.6 amps.
Hauppauge Capture hangs during the installation. What can I do?
Check for the presence of "Constant Guard" from Exfinity. If present, uninstall it, then re-run the installation for Hauppauge Capture. Once installed you can reinstall Constant Guard.
How can I record party chat from the Xbox One?
Here's a tip from an HD PVR 2 user:
"With the Xbox One, to record game commentary I do this:
in Kinect settings, use the Kinect mic which forces the party chat to come out of the TV speakers.
The Hauppauge game recorder will then pick up the party chat when recording game audio.
In order to record your voice (which won't come through the speakers and be picked up), you need to have a Mic plugged in to your
PC and place near your face as you do. Then make sure in Hauppauge Capture you select the mic in the drop down menu and set level.
Then you will get the game chat and the game audio recorded, and you speak to your party via Kinect microphone.
Basically, one mic to chat with your party and one mic to record your game commentary."
How can I restart Device Central?
Device Central is a Windows service which monitors the record button on the HD PVR 2. Sometimes Device Central will close. If so, you can restart it by going to Windows Explorer and looking in ProgramFiles -> Hauppauge -> DeviceCentral and then running the program HCWDCTrayTool.exe
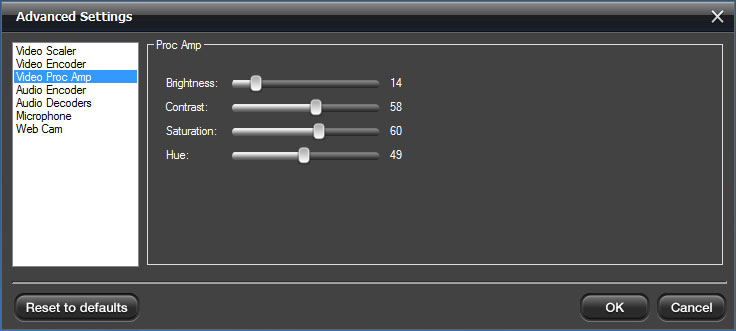
How can I adjust the color settings of my recordings
HD PVR 2 can adjust the color settings of both the recordings and the passthrough video.
To adjust the color settings, open Hauppauge Capture and go to the Capture tab. Then click the Advanced button at the bottom and go to Video Proc Amp. Here you will see the color and briteness settings.
Turns out my problem was on the Alibi end - My security has a few different HDMI output resolutions - I guess default on Alibi is 1024 X 768. That does not work with Colossus 2 ! Quick change to 1920 X 1080, and it is all working great now.
HD PVR 2 Troubleshooting
What do the lights on front of HD PVR 2 mean?
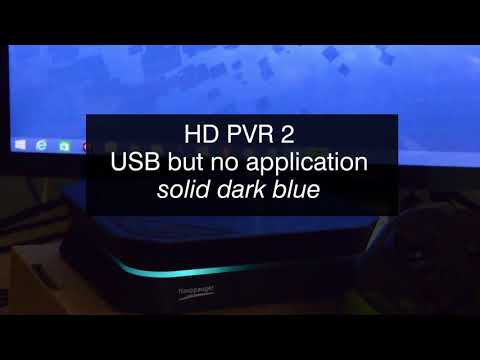
Blue light: When HD PVR 2 is powered on and the Windows driver is running, the blue light is on solid. When the blue light is blinking, the HD PVR 2 is not 'seen' by your PC. Check the USB cable!
Yellow light blinks once when Hauppauge Capture runs and means the HD PVR 2 detects video on the selected Video Input source. If the Yellow light blinks once and then turns to Blue, it means that Hauppauge Capture cannot detect a video signal. There are several reasons this can happen:
You did not plug in a video cable, or you have the wrong video source selected in Hauppauge Capture. In the Capture tab, make sure Video input is set correctly: HDMI or Component video. And check your video cable and your cable connections! If you have a bad cable or have made a mistake plugging in the cables, you will see a Blue light.
Green or Blue LED ring: indicates that HD PVR 2 is recording video.
Red light: this means the video encoder inside HD PVR 2 cannot send data to your PC. There are a number of reasons this could happen. If your PC is running slowly and cannot get data from HD PVR 2 quickly enough, the red light might go on for a few seconds until the PC can accept data. If there is a problem with your USB cable or the USB port on your PC, the red light might be illuminated. Change to another USB port on your PC, then power down HD PVR 2, wait a few seconds and power up again. If you continue to see the Red light while recording, check your cabling and if you continue to have problems, contact Hauppauge technical support.
"Device is not available" error message
If you are using Windows 10, make sure you have downloaded and installed the latest version of Hauppauge Capture. A recent Windows 10 update changed Privacy settings and requires the latest Hauppauge Capture to fix this message.
If you are using Hauppauge Capture, this error is normally caused if you did not fully install Hauppauge Capture or something such as anti-virus software prevented Hauppauge Capture from installing. Please go to the Hauppauge Capture download page and follow the installation instructions once more.
Note: make sure you remove the power plug on the HD PVR 2 for a few seconds after installing a new version of Hauppauge Capture. This resets the HD PVR 2 and gets it ready for the new application.
Black screen in the Capture preview window and no video on your TV set:
First, make sure, in the Capture tab: if you are using an Xbox, make sure your Xbox is set to 720p or 1080p. Some other Xbox video formats will give a black screen in Capture and your TV set.
If you still do not see video on your TV set or on your PC screen, if you are using a PS3 you might need to reset the video mode on your PS3. To do this on the PS3 Slim, push the power button on the front until the light goes red. Then push and HOLD the button until you hear two beeps. Then you can release the power button and the PS3 video format will be set to the default.
If you are using an Xbox, change your HDMI cable in case you have a broken wire inside the cable.
Black screen in the Hauppauge Capture preview window:
First, make sure, in the Capture tab: Source: make sure your Hauppauge device is selected. Video Input: select HDMI if you are using a game console or PC with HDMI, or Component (YPrPb) if you are
using a PS3. Audio Input: select HDMI when using a game console or PC with HDMI, and Line in (RCA) if you are using a PS3
If you still do not see your game video in the preview window in the Capture tab:
Most problems here are basic cabling and settings in game consoles. Check you cables!
If you choose the wrong video source, you will get a black screen. For example, if you connect Component video but Arcsoft Capture is set for S-Video, you will get a black screen.
Uncheck "hardware acceleration" in Capture. On some PCs, hardware acceleration will not work and you will see video on your TV set but not on your PC screen.
If you are using a PS3, check to make sure the Red, Green and Blue cables are connected from the game console to the same color RCA connectors on the Hauppauge AV cable on HD PVR 2.
As a test to make sure the cables are correct and are working, connect the game console directly to the HD TV set with the same video game component cables. If you see your game on the HD TV set, then the cables are o.k.
Then:
Step 1: Check your USB cable and make sure the blue light is on on the front of HD PVR 2.
Step 2: Check your video cables.
Try removing each cable and make sure it is firmly reseated into each device you are using.
Is the yellow light on on the front of HD PVR 2? If the yellow light is not on, then either you have the wrong Video input source set or your game console is not turned on. On the PS3, disconnect the HDMI cable between the PS3 and your TV set. Having HDMI connected at the same time as Component video will shut off Component Video and you will not see video in ShowBiz.
On the PS3, if you left the HDMI cable connected by mistake, then once it is removed you need to reset the Video format. To do this on the PS3 Slim, push the power button on the front until the light goes red. Then push and HOLD the button until you hear two beeps. Then you can release the power button and the PS3 video format will be set to the default (480p plus AV out).
Step 3: Once you have confirmed your video source is on, the Video input is correctly set and the yellow light is on the front of HD PVR 2, if you still see a black video screen in Arcsoft ShowBiz try capturing some video in the Capture module. If you can successfully playback a recording but you cannot see live video in the Preview window, there might be a video rendering problem (video card drivers, hardware acceleration…) Check device settings for video decoder details. To enable hardware acceleration, select "hardware acceleration" in ArcSoft ShowBiz Capture.
If capture fails, it is likely something is wrong with the video input to HD PVR 2. This could be a broken or loose video cable or you plugged the cables into the wrong connector on HD PVR 2.
No audio in your recordings?
"I'm able to record the video, but there's no audio recording. Is there something I am not doing correctly? I have HDMI out from my laptop to the HD PVR 2."
Make sure your PC audio output is going to the HD PVR 2. To check this, right click the speaker icon in the device tray and select 'Playback Devices' or 'Open Sound Settings'. Under 'Choose your output device' or under 'Playback devices', make sure you have the 'HDPVR2' selected. Click on 'Set Default'.
Troubleshooting tips with the Xbox 360
Freeze in Hauppauge Capture: on the Xbox 360, in 'Display settings' there's a setting called 'Display Discovery'. If you have it enabled, the Xbox automatically retrieves your TV's audio and video settings. Doing this gives you the option to choose from several resolutions to be displayed, i.e. 1280x768 and 1360 x 768. Choosing one of these formats will cause HD PVR 2 to freeze. So only use 1080p or 720p.
Freeze in Hauppauge Capture: in some PC systems, the audio Windows driver is an older version and needs to be upgraded to work with the Hauppauge Capture. Please go to your PC's manufacturers website and find an update to your sound system.
Troubleshooting tips with the PS3
Make sure you remove any HDMI cable connected to the PS3. If you do not disconnect the HDMI cable from your PS3, Component video will NOT be enabled and you will have a black screen in Capture.
Reset the PS3 video mode when you connect the HD PVR 2. To do this:
- Make sure you have the HDMI cable disconnected on your PS3
- Then push the PS3 power button on the front of the PS3. You should see the light go Red. This means your PS3 is turned off.
- Then hold down the PS3's power button until you hear two beeps (one beep, then about 5 seconds and a second beep).
Your PS3 should now be set to Component video out and you should see video in the preview window in the Capture preview window.
Plug the PS3 Component video cable that came with the HD PVR 2 into the AV connector on the back of your PS3. Then connect the colored RCA connectors (Red, Green, Blue video plus White and Red audio) of the PS3 Component video cable into the Hauppauge Component AV Cable adapter. The Hauppauge Component AV Cable adapter plugs into the back of the HD PVR 2 where it says AV in.
Next, in the spot on the back of HD PVR 2 which says 'HDMI out', plug one of the HDMI cables. Plug the other end of the same cable into your TV set. (The HDMI In connector on the back of HD PVR 2 is not used with the PS3, so just ignore that port)
To complete the installation, open Arcsoft Showbiz on your PC and click on Capture. This should open the Capture window. Make sure that the Hauppauge Siena Video Capture is selected in the Source dropdown menu. Now, from the Video Input drop down menu, select 'Component (YPbPr)'. If all goes well, you should see your PS3 video in the Capture preview window.
If, however, you do not see video in the Capture window, you may have to go into your PS3's Display settings and change to Component video.
Pass through video problems (if you do not see your game console video on your TV set, but you can see video in Capture)
Once HD PVR 2 is turned on and you run Capture and set the Source, HD PVR 2 will run even if you remove your PC. In order for you to see your game video on your TV set:
the HD PVR 2 needs to be powered on
you must run Hauppauge Capture or Capture once and choose your Video input source (HDMI for the Xbox and Component video for the PS3)
After you set the Video input source, you can remove your PC and the input you selected will stay until you change it or you turn the power off on the HD PVR 2
No video passthrough or I see flashing or distorted video on my TV monitor:
If you have a PS3, you might need to reset the video on your PS3. To do this, push the Power button on the front of your PS3. It will turn red. Then, PUSH AND HOLD the power button until you hear the SECOND beep. The second beep means the video mode has been reset. You should now see video on your PC screen and on your TV set.
Open ShowBiz and verify the correct Video input is selected. Video and audio input must be set initially for passthrough to work (if you power cycle the HD PVR 2, it may revert to its default setting and will need to be set again).
No video on my TV monitor but I can see video in the Capture tab
Check that the HDMI cable from the HD PVR 2 (HDMI out) is connected to your TV monitor and the TV is set to the correct HDMI port if multiple are available on yourTV.
Try changing the output resolution from your game console to 720p. Some TV monitors may not support all HDMI output resolutions.
I can not see my game video on either my PC screen or on my TV set
If using HDMI, verify your source device does not use HDCP copy protection (the PS3 uses HDCP on HDMI). If this is the case use the Component video input.
If you are using a PS3, make sure your HDMI cable is not plugged in.
You might need to reset your game console video in order for passthrough to work. To reset the video, do the following:
PS3: Turn the PS3 off via the power button on the front of the unit. Flip the power switch on the back of the PS3 to the off position. Push and hold the power button on the front of the PS3 while you flip the power switch on the back of the PS3 to the on position. Once you hear the second beep, release the power button on the front of the PS3. Your PS3 video will be reset.
Xbox: Remove any games from the optical drive. Turn the Xbox 360 off. Turn the Xbox back on via the controller. As the console starts, press and hold the Y button, and then pull the right trigger at the same time. Your Xbox video will be reset.
HD PVR 2 inputs and outputs and how they are configured
The HD PVR 2 was designed to pass through any input to the HDMI output of the device. So whichever input you choose (composite, S-Video or Component) will be routed to the HDMI out.
NOTE: if you are using composite or S-Video input, the HDMI video output will be standard definition even though you are using component cables.
Troubleshooting the HD PVR 2
Note: There appear to be a number of HD PVR 2 users who are extending their USB cables because their computer is located a distance from HD PVR 2. This can potentially cause problems such as "no device detected" or a black screen in Showbiz Capture or bad video recordings. If you are using a long USB cable and are having problems, do an experiment and see if you problem goes away by connecting HD PVR 2 to your PC with the USB cable supplied with HD PVR .
Black screen in Showbiz Capture
Next, check input make sure the video source setting is correct for your cabling. Do you see a valid resolution and bit rate for source? Try changing the resolution of the source ..
If you have a Resolution and Bit rate shown, check “enable preview” setting.
Try to capture. If capture is successful the problem could be a video rendering problem ( video card drivers, hardware acceleration…) If capture fails, there is something wrong with the video or audio input.
Black screen with game consoles
Most problems here are basic cabling and settings in game consoles.
PS3 or Xbox 360: do you have the correct A/V cables? The PS3 and Xbox 360 do not include the A/V Component cables. These need to be purchased separately.
When using Coponent video, check and make sure the Red, Green and Blue cables are connected from the video source to the A/V Input on HD PVR 2.
As a test to make sure the cables are correct and are working, connect the game console directly to the HD TV set with the same video game component cables. If you see your game on the HD TV set, then the cables are o.k.
Pass through problems
Pass through problems, such as a black screen on your TV set (even though you can record videos), are usually basic cabling and settings in Showbiz. Check your cables!
The best way to proceed is:
disconnect the game console from whatever it is connected to …. all cables (component, audio, HDMI)
then start by only connecting the game console to the HDPVR using any cable set
Run TMe and make sure you can see video on your PC screen
Once you know HD PVR 2 can preview video and capture, connect the pass through to your HD TV set
If all input and pass through connections are correct and pass through is still not working, check your HD TV for correct input source. If input is correct, try changing input resolution of source to HDPVR 2.
Video/ Audio Stutter
If you have stutter in your preview window, check that system specs meet the minimum required. This is not a fatal problem since the HD PVR 2 will make good recordings even if the preview window slows down.
Preview good but stutters in playback on your PC screen: this normally means your PC or graphics card is too slow. Check the video card specs.
Trying to record an Alibi (HkVision) security system to the Colossus 2 but getting a black screen
Turns out my problem was on the Alibi end - My security has a few different HDMI output resolutions - I guess default on Alibi is 1024 X 768. That does not work with Colossus 2 ! Quick change to 1920 X 1080, and it is all working great now.
Random lockups
Try a different source
Try a different USB port
Don't use extra long USB cables
If you are using a hub, remove it
Remove other USB devices if they could hog bandwidth (such as a USB camera)
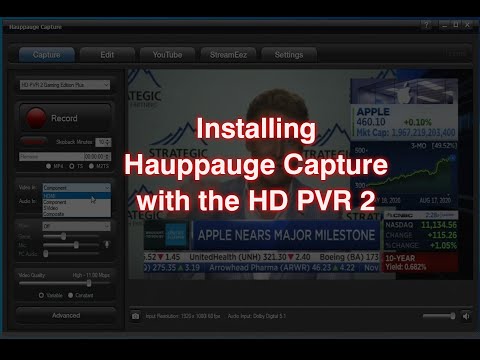
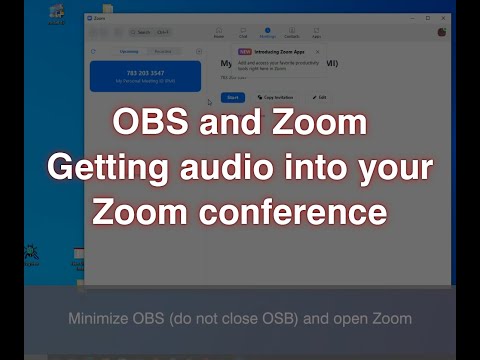
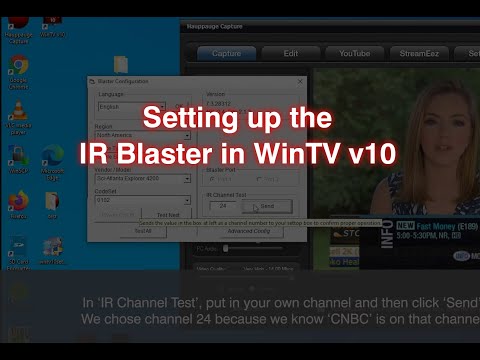
HD PVR 2 and Colossus 2 Installation and Use Videos


